Instagram Facebook Twitter Bloglovin Pinterest Linkedin

Studs and Flicks

  • Home
  • About
  • Disclaimer
  • Directory
  • Fashion
  • Beauty
  • Lifestyle

Who doesn't love chocolate and strawberries?
Today's post is a recipe that is perfect for Valentine's Day, whether you are spending it with a loved one or having some me-time. It's a three layered chocolate cake, topped with dark chocolate dipped strawberries. The icing is even white chocolate flavoured. It would be a great dessert for a Valentines date night, as it's impressive to look at when cut, as it has an ombre effect. Chocolate dipped strawberries are a typical Valentines date food, and having it mixed with a cake, makes this recipe even more decadent for this holiday. Even if you aren't celebrating Valentines Day and are single, this cake recipe is great for a relaxing evening in by yourself, or sharing with your best friends.


Ingredients

Cake

360g Softened Butter
360g Caster Sugar
6 Eggs
10 tbsp Milk
360g Plain Flour
4 tsp Baking Powder
100g White Chocolate
100g Milk Chocolate
100g Dark Chocolate
1 tsp Vanilla Extract
6 tbsp Cocoa Powder

White Chocolate Buttercream

175g White Chocolate
250g Unsalted Butter
500g Icing Sugar
3 tbsp Milk

Decorations

8 Large Strawberries (Washed)
100g Dark Chocolate

Method


1 - Preheat the oven to 170c.
2 - Grease and line with baking paper 3 x 20cm circular baking tins.


3 - In a stand mixer, beat the caster sugar and softened butter together until light & fluffy.
4 - Add the eggs to the mix, one at a time, beating well after each addition.


5 - Once all of the eggs have been added, add 6 tbsp of milk, and beat again. Then sift the flour and baking powder into the mixture, and mix until fully combined.


6 - The divide the mixture evenly into three bowls. Put to one side.
7 - Now on to melting the chocolate. Break up each of the different chocolates into three small bowls, and melt in a microwave. You can use the bain marie method if you prefer. Let cool slightly, but not harden.


8 - For the white chocolate layer, add a tablespoon of the cake batter into the melted white chocolate, and stir quickly. Then gently fold the white chocolate mix and vanilla extract, into the rest of the cake mixture. Once fully combined, pour into one of the tins, until 2/3 full.
9 - For the milk chocolate layer, stir in 2 tbsp of milk and 3 tbsp of cocoa powder into the second bowl of cake batter. From this bowl, add a tablespoon of the mixture into the melted milk chocolate, and stir quickly. Then fold the melted chocolate mix back into the cake batter. When fully combined, pour into one of the tins until 2/3 full.
10 - For the dark chocolate layer, stir in 2 tbsp of milk and three tbsp of cocoa powder into the final cake batter bowl. Then quickly mix a tablespoon of the cake batter into the melted dark chocolate. Fold the melted dark chocolate mix back into the cake batter, until fully combined. Pour into the final tin, until 2/3 full.
11 - Smoother out the top of each cake mix, and bake all three cakes for 25 minutes, until the cake springs back when pressed lightly and when a skewer comes out clean.


12 - Let cool in the tins for 2 minutes, then remove and cool completely on wire racks. Don't forget to peel off the baking paper from the bottom of the sponges.


13 - Whilst they are cooling, melt 100g of dark chocolate in the microwave. Then dip your washed strawberries into the chocolate, letting the excess drip off. Then lay them on a plate covered in baking paper. Leave to harden in the fridge.


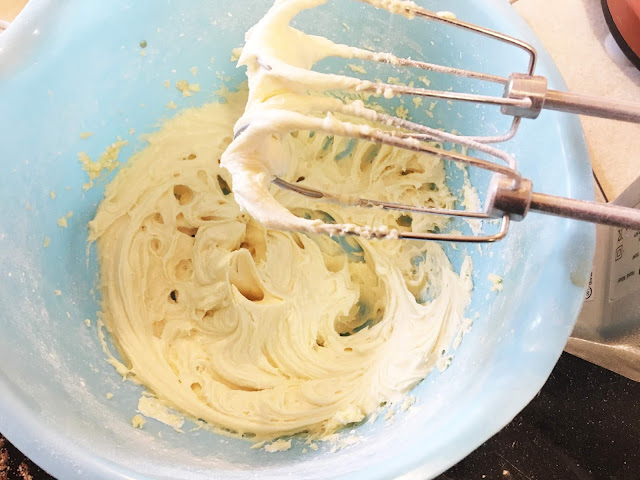
14 - Now to make the icing. Melt the white chocolate and leave to cool. Then beat together the butter and icing sugar, until fluffy and combined, in an electric stand mixer. Finally, add and beat in the cooled white chocolate and 3 tbsp of milk.


15 - Once the cakes are cooled and the icing is ready, it's time to assemble the cake. Place the dark chocolate sponge onto your cake board/stand first, and spread a layer of icing on top.
16 - Then place the milk chocolate sponge on top of the icing. Cover the top of this sponge with icing too.
17 - Add the white chocolate sponge on top of that layer of icing, and then cover the top of the white chocolate sponge with icing. Also take the icing down the side of the cake too. This layer of icing should be thin, as it is just to seal in the crumbs. Place the cake in the fridge to harden slightly for 30 minutes.


18 - Remove from the fridge, and cover the cake with more icing and smooth the icing as best as you can, as this is the final layer. I'm not the best at icing, so just try your best.
19 - Finish with decorating the top of the cake with the chocolate dipped strawberries.
20 - Slice the cake and enjoy!


And that is how you make this triple chocolate layer cake with chocolate dipped strawberries! A perfect Valentines Day recipe, that's great for a romantic date night, a girls night or for a relaxing solo night in.

I hope you like this recipe and have a great Valentines/Galentines, if you like to celebrate it.
Let me know if you make it!

Share
Tweet
Pin
Share
No comments

Today's post is a recipe for a gorgeous gingerbread flavoured cake, with gingerbread icing. This cake is so tasty, and the sponge is beautifully fluffy & light. It is a great cake for this time of year, and would make a great alternative dessert on Christmas day, if your family doesn't like Christmas pudding. Depending on how you decorate it, it could be a great showstopper cake at a Christmas party this season too. Everyone in my family loves it, and I think it will be asked for every Christmas from now on.


Ingredients

Cake

150ml Full-Fat Milk
3 tbsp Black Treacle
225ml Vegetable Oil (+ extra for pan greasing)
375g Plain Flour
3 tsp Baking Powder
1 1/2 Bicarbonate of Soda
375g Light Brown Soft Sugar
2 tsp Ground Cinnamon
2 tsp Ground Ginger
300ml Buttermilk
3 Large Eggs
3 tbsp Amaretto (not pictured above)
1 1/2 tsp Vanilla Extract
Pinch of Salt


Icing

200g Butter
400g Icing Sugar
1 tsp Vanilla Extract
2 tbsp Black Treacle
1 tsp Ground Cinnamon
1 tsp Ground Ginger


Decorations

50g Desiccated Coconut
Homemade Gingerbread Biscuits (recipe)


Method


1 - Preheat the oven to 180C. Then, line & grease 3 x 20cm cake tins ready for the cake mix.


2 - Pour the 150ml milk and 3 tbsp of treacle into a saucepan. Bring to a gentle simmer, stirring constantly until combined. Leave to cool.


3 - In a stand mixer, add the 375g of Plain Flour, 3 tsp Baking Powder, 1 1/2 tsp Bicarbonate of Soda, 375g Light Brown Sugar, 2 tsp Ground Cinnamon, 2 tsp Ground Ginger and a pinch of salt. Gently mix the dry ingredients until the brown sugar breaks up, and you have a sand-like texture. 


4 - In a large jug, whisk the 300ml Buttermilk, 225ml Vegetable Oil, 3 Eggs, 3 tbsp Amaretto and 1 1/2 tsp Vanilla Extract together. Once mixed, add the milk-treacle to the jug and mix well. 


5 - Pour the wet ingredients into the dry ingredients, in the stand mixer. Whisk the ingredients together to form a smooth cake batter. 


6 - Divide the batter equally between the three tins and bake for 25-30 minutes, until a skewer comes out clean, after you poke it into the middle of the cake. Once cooked, cool the cakes in the tins for 10 minutes. 


7 - Then turn out the cakes onto a wire rack, for cooling. Remember to peel of the baking paper from the bottom of the cake. Leave to cool completely. 


8 - When the cakes are cool, make the icing. In a stand mixer, whisk the 200g of Butter and 400g Icing Sugar together, until combined. Then add the 1 tsp Vanilla Extract, 2 tbsp Black Treacle, 1 tsp Ground Cinnamon and 1 tsp Ground Ginger to the mixer, and whisk until combined & has an icing-thick texture.


9 - Place the first cake sponge layer on your chosen cake board. Then spread a thin layer of icing on the top of the sponge. Apply the next sponge layer, and spread icing on the top of that sponge. Then add the final sponge, and apply the icing on the top. 


10 - Smooth a thin layer of the icing around the sides of the cake. It won't look pretty just yet, as this is the crumb layer. Place in the fridge for 30 minutes, to set the icing. 


11 - Once out of the fridge, spread the remainder of the icing (should be about half of the original mixture) on top of the hard crumb layer. Smooth out as this is the final layer. 


12 - Then finish your cake with whatever decorations you like. I decided to go with some desiccated coconut on the top, to look like snow, and several gingerbread biscuit trees around the outside.
And that is it!
Finished!


And that is how you make this delicious gingerbread cake, with gingerbread icing. It's a perfect cake for this festive season, whether you want it for cosy winter nights in, or as a centre piece for your holiday party.


I hope you like this recipe, and let me know if you decide to make it.

Share
Tweet
Pin
Share
No comments

Before I get into this recipe, I just wanted to say that I am sorry for not posting yesterday. However, you are still going to get a full 10 days of blog posts for Halloween, I have just decided to post actually on Halloween now. To be honest, I was very hungover on Sunday, so I couldn't concentrate on finishing a blog post. Anyway, let's get on with todays!

For a change from all the makeup looks, I have decided to do a Halloween themed baking recipe. This recipe is lemon & ginger Voodoo doll biscuits. They are simple to make, very tasty and you can have lots of fun with the decorating. If you don't like the idea of icing Voodoo dolls onto these, you could ice skeletons on them instead. 


Ingredients

100g butter (softened)
50g caster sugar
1 large lemon, zested
8 pieces of crystallised ginger, finely chopped
175g plain flour
Different coloured writing icing

Method


1 - Preheat the oven to 150c, and line 2/3 baking sheets with baking paper. 
2 - Put the butter a large mixing bowl, and beat with a wooden spoon until soft. 


3 - Once soft, beat in the sugar, until well combined.


4 - Stir into the butter & sugar mixture, the lemon zest and the chopped ginger.


5 - Then stir in the flour. Start by mixing with a wooden spoon, and then combine the ingredients together using your hands to form a dough. 


6 - Then roll out the dough on a lightly floured surface. The dough is soft and a little crumbly, so take your time and be careful when transferring to your baking sheets. Once you have cut all of your men out with a cookie cutter, prick each one with a fork all over. Bake for 20 minutes, until golden brown. They will still be soft when removed from the oven.


7 - Leave to cool on a wire rack. 
8 - Once cool, you can go crazy with the decorating! Have fun with the decorating, and remember, you don't have to do voodoo dolls, they could be skeletons instead. 
And that is it!
Finished!


And that is how you make Voodoo Doll Biscuits! A perfect sweet treat for a spooky Halloween night in or for a Halloween party. 

I am not the best at icing, but I think these are super cute and spooky.
I hope you guys liked this recipe and let me know if you try to make them!

Share
Tweet
Pin
Share
No comments

I've been really into baking recently, especially with my nearly-two year old nephew. I love teaching him how to cook/bake, and getting him involved with the simple steps of a recipe. He always loves watching my stand mixer whisking cake batters etc, and very much enjoys eating the end products!

Today, we were testing out a possible recipe for his 2nd birthday party, as his party is dinosaur themed. I wanted to make something different to cupcakes, as there would already be a birthday cake. So I decided to make brownies, with a dinosaur twist. 
These Dinosaur Fossil Brownies are dark/milk/white chocolate brownies, with chocolate buttercream icing, crushed Oreos and white chocolate dinosaur fossils on top. It was my first attempt at making these, and my first attempt as chocolate work. I don't think I did a bad job with the fossils, and the brownies were amazingly gooey. These are very chocolatey, so if you aren't a big chocolate fan, then you won't enjoys these.


Ingredients

For Brownies

185g Unsalted Butter
185g Dark Chocolate
85g Plain Flour
40g Cocoa Powder
50g White Chocolate
50g Milk Chocolate
3 Large Eggs
275g Golden Caster Sugar

For Icing

50g Dark Chocolate
100g Unsalted Butter
200g Icing Sugar
1 tsp Vanilla Extract
Dash of Milk

Toppings

10 Oreos (Crushed)
Choco Writers - White Chocolate

Recipe should make 12 brownies.

Method


1- Prep a square tin, roughly a 21cm x 21cm tin. Rub a small amount of butter all around the tin and then stick a square of greaseproof paper on the bottom. Put to one side, and pre-heat the oven at 180C. 


2- Place 185g softened butter and 185g dark chocolate (cut into chunks), in a medium sized bowl, suitable for heating on a hob. Using the bain-marie technique and on a low heat, melt and stir the two ingredients together. Once melted, take the bowl from on top of the saucepan, and place to one side to cool to room temperature. 


3- Whilst the butter/chocolate mixture is cooling, chop the 50g of white chocolate and 50g of milk chocolate into small chunks, and put to one side. In a small bowl, sieve the 85g plain flour and 40g of cocoa powder together. Then in a stand mixer (or hand mixer & bowl), crack the three eggs in and tip in the 275g of caster sugar. Mix on a high setting, until thick and creamy, & so the mixture is nearly double in size. 


4- Remove the bowl from the mixer, and pour in the cooled chocolate/butter mix. Using a rubber spatula, gently fold the chocolate into the egg mixture. Be gentle and slow, to try and not remove the air from the mixture. 


5- After, sieve the flour/cocoa powder into the eggy/chocolate mixture, and again, gently fold the mixture together. It should look gooey and fudgy, but don't over mix. Then, stir in the white and milk chocolate chunks until they are dotted around the mixture. 


6- Pour into the prepare tin, using a rubber spatula to smooth out the mixture. Place in the oven for 25 minutes, or until the top has a shiny & papery crust. Remove from the oven, leave to cool in the tin, and then once cool, turn out onto a cooling rack. 


7- Whilst the brownies are cooling, make the icing and prep the toppings. Firstly, melt 50g of dark chocolate using the bain-marie method, in a small bowl. Leave to cool. Then, in a medium bowl, whisk the 100g of butter until soft. Slowly whisk in the 200g of icing sugar to the butter, and then add the vanilla extract. 


8- Once the chocolate is cool, fold in the melted chocolate to the butter/sugar mixture, until fully combined. If the mixture is a little stiff, add in a dash of milk. 


9- For the crushed Oreo topping, bash 10 Oreos in a food bag, with a rolling pin. Put to one side.


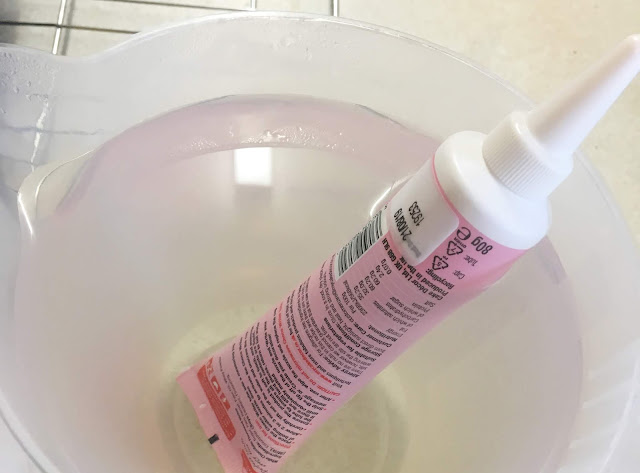
10- For the dinosaur fossils, follow the instructions on the icing tube and pipe out dino fossil shapes. I printed a template online and traced the fossils onto cling film. Leave to cool in the fridge for a few minutes. 


11- To assemble the brownies, first spread a thin layer of icing onto the brownies. Then press into the icing the crushed Oreos, to give the impression of dug up ground. Then, I cut the brownies into 12 rectangles.


12- Then place onto the Oreos, the white chocolate fossils. I just placed the fossils on top, but you can stick them down with a little bit of the icing. Also, it doesn't matter if the fossils break up, as that adds to the fossil dig look. 
And that is it! 
Finished!


And that is how you make these Dinosaur Fossil Brownies, perfect for a dinosaur themed party!

I think they are very striking to look at, and the brownies are lovely & gooey to eat.
Hope you guys like them, if you try to make them.


Share
Tweet
Pin
Share
No comments
Older Posts

About me

About me
*Blog ended July 2019* Shannon Furniss - A recent MA Fashion & Textiles Graduate & Fashion Designer. I'm 25 years old, UK based (Leicester/East Midlands), and a Dalmatian mummy to my baby boy, Wizard. For all enquiries - s.a.furniss2303@gmail.com or hit me up on any of my social media accounts.

recent posts

Blog Archive

Search This Blog

Popular Posts

  • Review - L'Oreal True Match Foundation in Rose Ivory & L'Oreal Lumi Magique Primer
    Review - L'Oreal True Match Foundation in Rose Ivory & L'Oreal Lumi Magique Primer
  • Every ending is a new beginning...
    Every ending is a new beginning...
  • Wishlist Wednesday - Lingerie Wishlist #1 #BREASTWEEK
    Wishlist Wednesday - Lingerie Wishlist #1 #BREASTWEEK

Created with by BeautyTemplates | Distributed by Blogger